

Review an AI-upscaled image twice: first at the same display size as the source to judge real visual improvement, then at full resolution to find invented text, altered faces, doubled edges, plastic texture and amplified compression. Approve the exact exported file only when it improves the intended use without changing important content.
Decide what the larger image must achieve
Start with the intended placement, required dimensions and viewing distance. A small website card, a presentation image and a printed display ask different things of the source. Upscaling should solve a defined delivery problem, not become an automatic final step.
An AI image editor can help prepare an image for a larger use, but the added pixels are a generated interpretation of the source. They do not reveal hidden facts. Set an approval standard based on the subject and risk of visible changes.
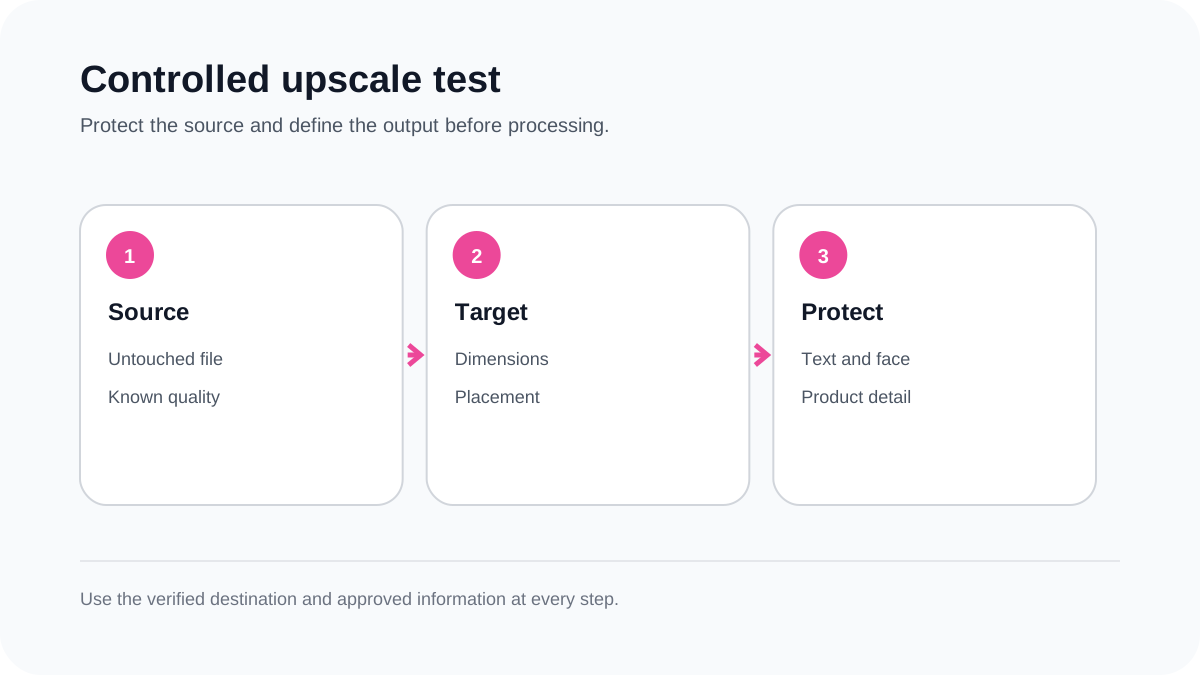
Write down the source filename, requested output, crop, color requirements and details that must remain exact. For a portrait, identity and expression matter. For a product, label text, shape, color and included parts may be commercially important.
Keep the source and make one controlled test
Preserve an untouched copy before resizing, sharpening or denoising. Create the first upscale from that source and record the chosen scale or output dimensions. Repeatedly processing an already altered file makes it harder to identify where a problem began.
Use one representative image before applying the workflow to a collection. Choose a source containing the difficult elements your set actually has: hair, foliage, fine fabric, small text, reflective edges, skin texture or repeated architecture.
Do not combine aggressive retouching, background replacement and upscaling in one approval step. Review major content changes first. The AI product photo review checklist provides a separate process for checking labels, colors, shapes and materials.
Compare both images at the same display size
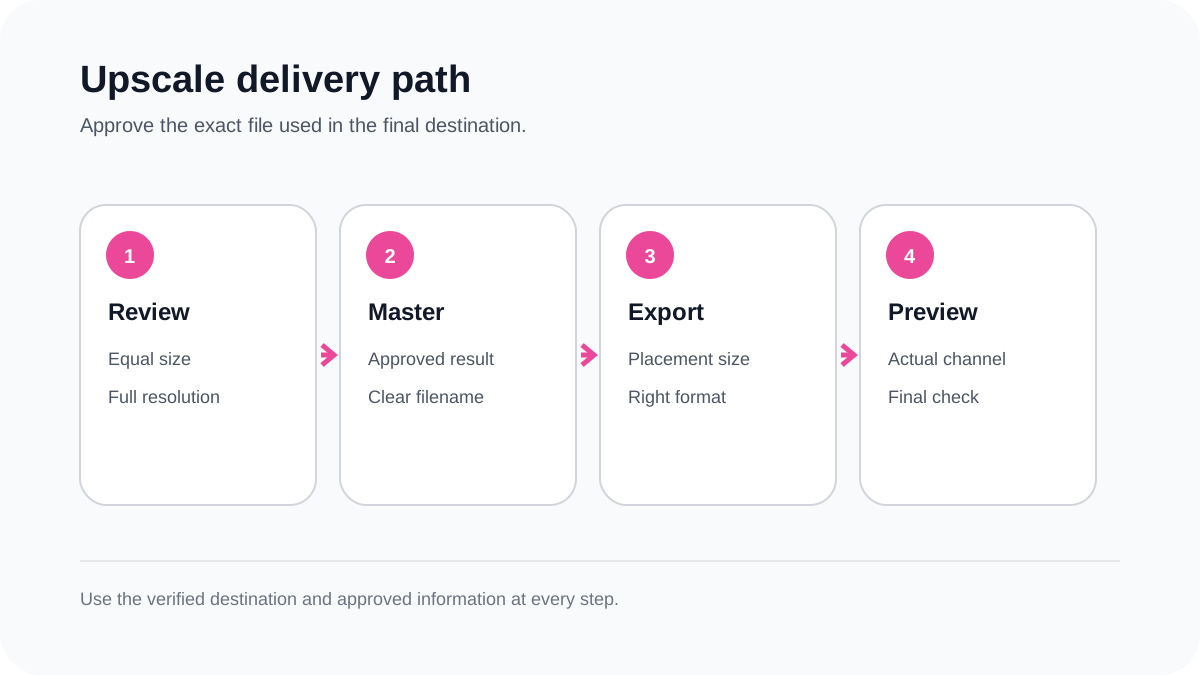
Open the source and upscaled result at an equal on-screen size. This prevents the larger file from looking better merely because it occupies more pixels. Compare overall clarity, believable texture, edge stability, color and local contrast.
Ask whether the upscale improves the intended viewing experience. A result can be technically larger while looking oversharpened, waxy or noisy. If the improvement is visible only at extreme zoom, it may not help the actual placement.
Use a neutral viewer where possible and keep magnification consistent. Browser previews, messaging apps and design tools may apply their own scaling. Record the viewer or export used when the decision needs to be repeatable.
Inspect important details at full resolution
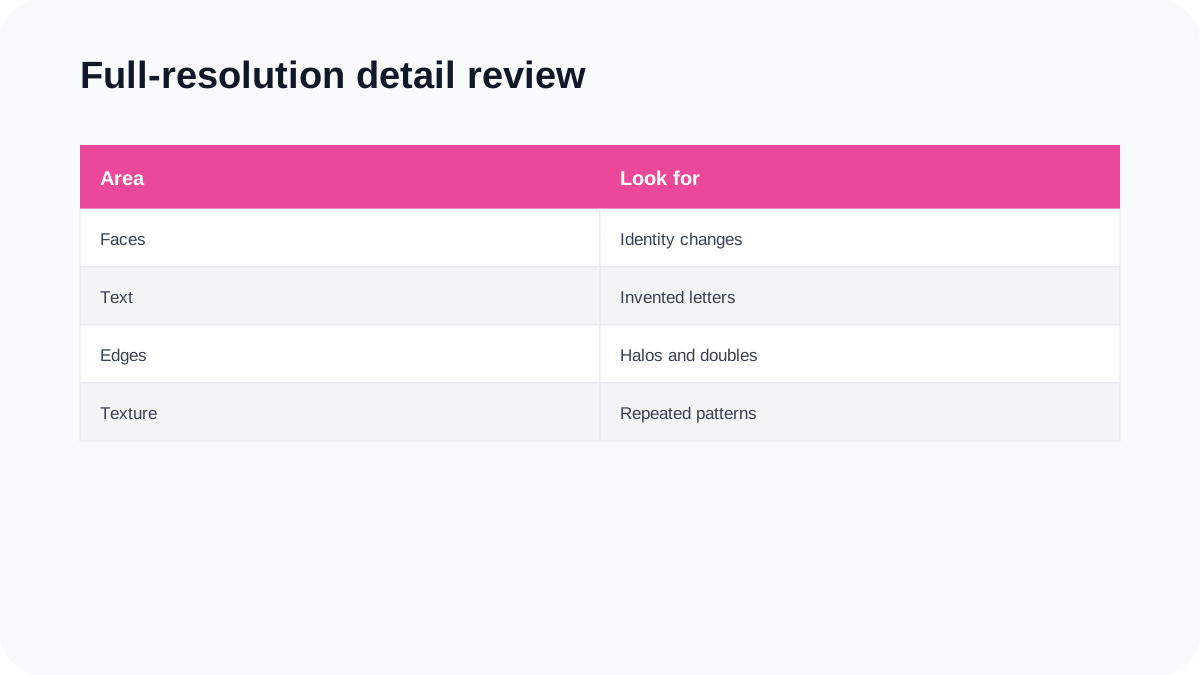
Now review the generated pixels closely. Check eyes, teeth, hairlines, hands, jewelry, product labels, logos, fine type, straight edges and repeated patterns. Look for doubled outlines, invented letters, inconsistent symmetry and texture that changes abruptly.
Small text deserves a literal comparison with the source or approved artwork. A plausible-looking word is still wrong when it changes a product label, sign or document. Replace it from the authoritative asset where appropriate rather than accepting generated lettering.
For portraits, compare identity-defining features with the source. For documentary or evidence-based images, avoid treating invented detail as recovered information. Keep the original available so viewers and reviewers can understand what was actually captured.
Check noise, sharpness and texture together
Upscaling may amplify compression blocks, halos or sensor noise, while a denoise step can remove natural surface variation. Judge these characteristics together. A perfectly smooth result is not necessarily more accurate.
Inspect boundaries between the subject and background. Look for bright halos, dark rims, broken transparency and details that blend across the edge. Hair, glass, mesh and reflective materials often reveal these problems quickly.
Review similar surfaces across the image. Fabric, wood, skin and painted metal should not switch between natural texture and repeated synthetic patterns. If a setting adds too much detail, reduce the intervention or return to a cleaner source.
Confirm the dimensions and crop you actually need
Check the exported pixel dimensions and aspect ratio. More resolution does not protect a subject from an unsuitable crop. Prepare the composition for the intended placement and keep important content away from areas the destination may cover.
If several placements need different shapes, create separate approved exports from the best available source. The social image crop workflow explains how one source can support multiple layouts without forcing one crop into every frame.
Do not enlarge a file simply to meet an arbitrary number. Choose dimensions appropriate to the display, print process or production brief. A smaller, carefully reviewed output can be more useful than an enormous file containing obvious generated artifacts.
Choose a delivery format after the visual review
Save a high-quality approved master where the workflow requires one, then create delivery files for the actual channels. Confirm whether transparency, photographic compression or scalable artwork is needed. Upscaling a raster logo is not equivalent to obtaining true vector artwork.
The guide to PNG, SVG and JPG formats compares practical export choices. The older LogoMakerr explanation of common image file formats provides additional background for a wider brand handoff.
Open the downloaded file rather than approving only the editor preview. Check dimensions, color, transparency, compression, filename and visual appearance. A successful export message does not prove that the saved file is the version you reviewed.
Use a repeatable approval record
Record the source, tool or workflow, output dimensions, date, reviewer, intended placement and accepted limitations. Keep rejected tests separate so they are not uploaded accidentally. A short record is especially useful when several similar files exist.
Name the approved export by subject, placement, dimensions and version. Avoid filenames such as enhanced-final-new. Include a suffix only when its meaning is documented and consistent across the project.
For a collection, sample the simple and difficult images after batch processing. One clean landscape does not prove that every portrait, label or texture survived. Stop the batch when a recurring artifact appears and review the source and settings before continuing.
Know when to use another source
Upscaling cannot make an out-of-focus, heavily compressed or tiny source reliable for every use. If the subject is important and another original exists, find it. For a product or logo, use the authoritative artwork or photograph rather than asking a model to reconstruct missing detail.
Treat the output as a visual derivative, not new evidence. The final decision should balance the intended viewing size, content accuracy and visible artifacts. When the result changes the subject or creates uncertainty, a smaller truthful image is the stronger choice.
People also ask
Frequently asked questions
Does AI upscaling recover the original missing detail?
No. It creates a higher-resolution interpretation from the available source. Important text, identity and product details must be compared with authoritative references.
Why compare images at the same display size?
Equal display size helps reveal whether the result is genuinely clearer rather than simply appearing larger because it contains more pixels.
Should I upscale before editing?
Resolve major content choices and factual corrections before final upscaling. Keep the original and test one controlled sequence so you can identify where artifacts appear.
Is the largest export always the best?
No. Choose dimensions for the actual placement and review the final file. Excessively large outputs can add storage and delivery cost without improving the intended viewing experience.