
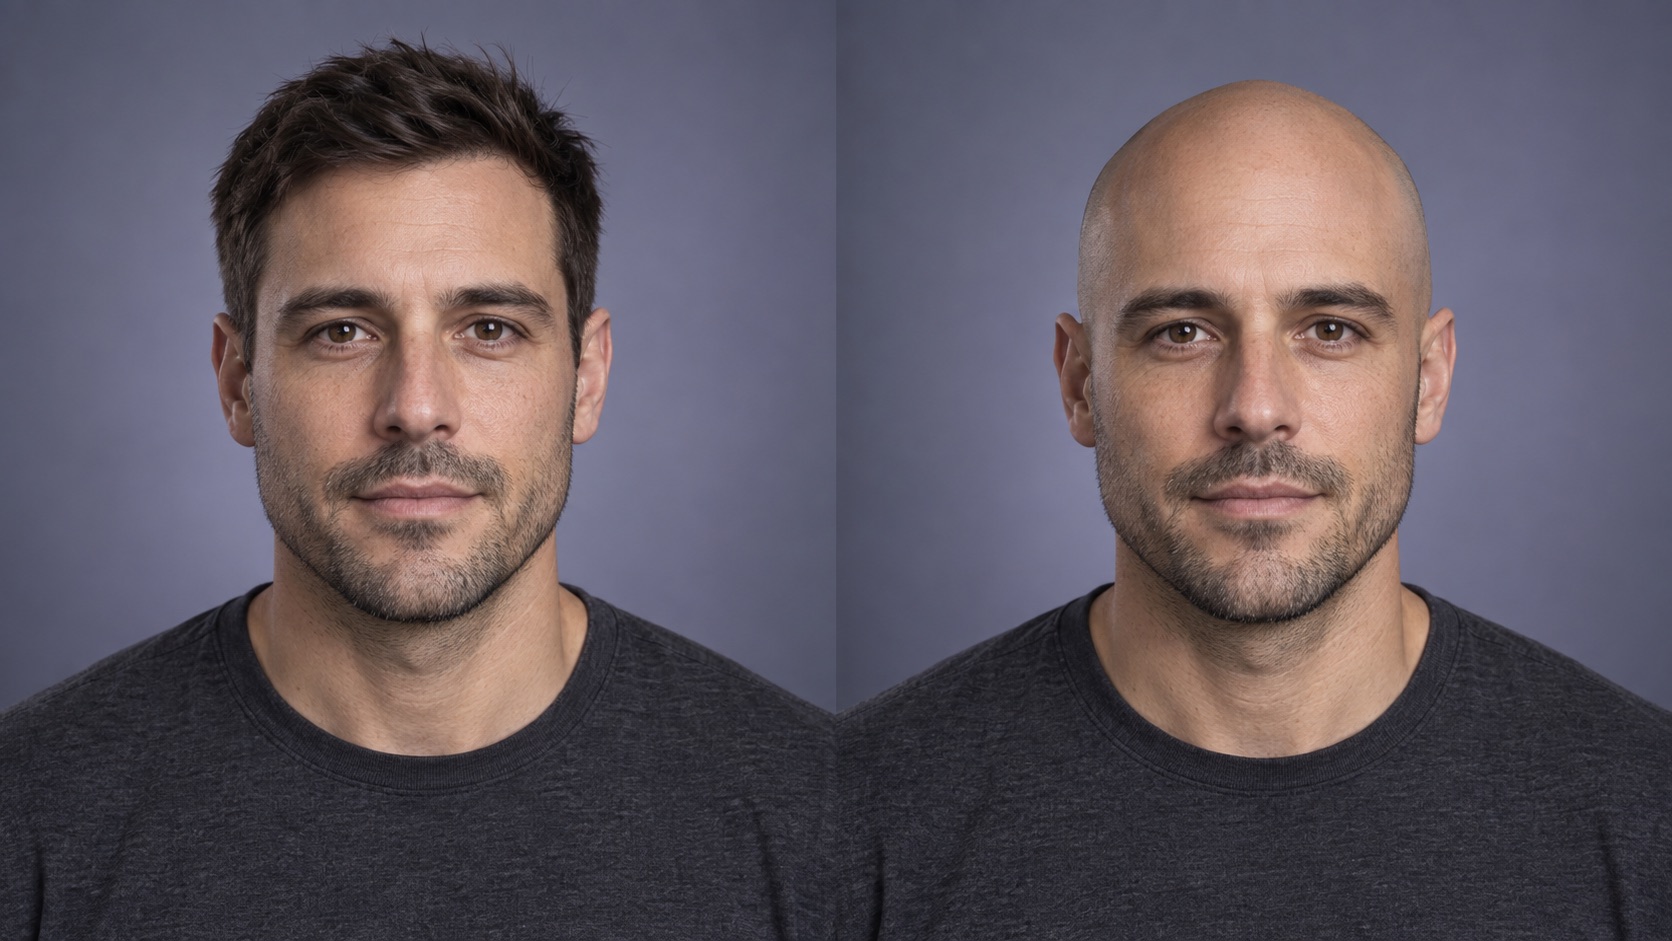
To preview a natural bald look with AI, start with a sharp adult portrait that clearly shows the face, ears, forehead, and current hairline. Request only a shaved-head or closely cropped result while preserving identity, head proportions, skin texture, pose, clothing, lighting, and background. Compare the result with the source at the same size, then inspect the scalp contour, hairline transition, ears, shadows, and facial features. Treat the image as a style concept, not a prediction about hair loss, health, or future appearance.
What an AI bald filter can—and cannot—show
An AI bald filter creates a fictional portrait variation in which visible scalp hair is removed or reduced. It can help you compare a shaved-head look with your current hairstyle, explore how facial hair or glasses balance the face, and prepare a more specific conversation with a barber or stylist. A useful result keeps the person recognizable while changing one visible styling element. It should preserve the eyes, nose, mouth, ears, jaw, skin tone, expression, camera angle, clothes, and background unless you deliberately request another edit.
Open the AI bald filter in Makerr Studio, then choose the dedicated natural bald look preview tool. The generated image is a visual concept, not evidence about genetics, follicles, treatment, health, or when someone may lose hair. It cannot reveal the exact shape of a scalp that is hidden in the source photograph, so some contour and texture will always be interpreted rather than measured.
Choose a source portrait that shows the whole head
Start with a sharp head-and-shoulders portrait taken near eye level. The forehead, temples, face, both ears, and top of the head should be inside the frame. Soft frontal light or gentle side light is useful because it reveals facial structure without creating hard patches that can be mistaken for hair or scalp shadow. Use the largest original file you have instead of a screenshot or a copy repeatedly compressed by messaging apps.
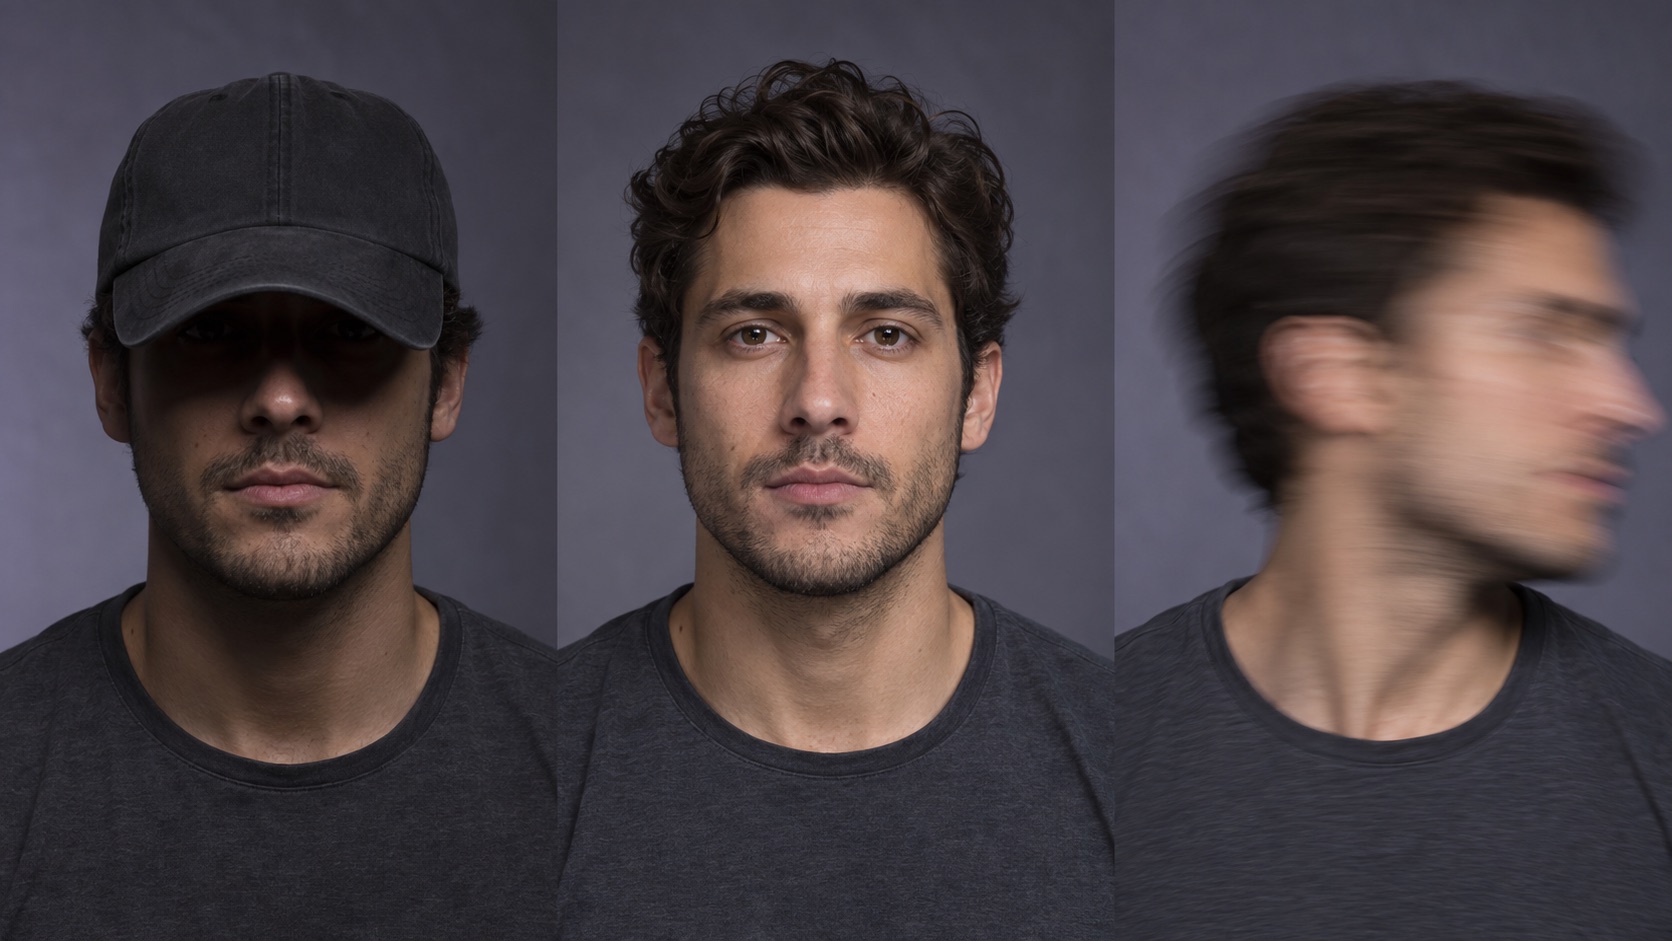
Avoid caps, hoods, hands on the head, thick hair falling across the forehead, heavy motion blur, and crops that cut through the crown. An extreme profile hides one side of the face and makes identity comparison harder. Strong overhead light may produce a bright patch on the top of the head, while deep side shadow can obscure the ear and temple. If several portraits are available, choose the one that gives the tool the least geometry to invent.
Decide whether you want shaved, buzzed, or fully bald
Bald is not one visual instruction. A zero-length buzz cut can leave a soft field of stubble and a visible hairline. A closely shaved head may show slight tonal variation without distinct strands. A fully bald concept usually removes that pattern more completely. Choose one direction for the first result because combining several interpretations creates an unclear review standard. If you are considering a real haircut, a short buzz preview may be a more practical first comparison than an unrealistically polished scalp.
Describe the requested finish in plain visual terms and keep the rest of the photograph fixed. For example: create a natural closely shaved adult hairstyle, retain subtle realistic skin texture, and preserve the same person, expression, head shape, ears, beard, glasses, lighting, clothing, and background. Avoid requests such as make me look better or perfect my head. Those phrases invite unrelated facial retouching and make it difficult to tell whether the style itself works.
Step by step: make a realistic bald preview
Upload the selected portrait and begin with one narrow edit. Generate a shaved or bald version without changing facial hair, glasses, expression, color grade, or background. Place the result beside the source at the same crop and size. First ask whether it is unmistakably the same person in the same photograph. Only after identity passes should you judge the styling direction.
If a revision is needed, change one variable at a time. You might ask for slightly shorter stubble, a softer transition at the temples, or less shine on the scalp. Do not combine a new beard, smoother skin, brighter eyes, narrower face, and different background with the hair change. Multiple edits hide the cause of improvement or drift. Save the strongest version before requesting another so a useful comparison does not disappear inside a longer experiment.
- Use an adult portrait that you own or have permission to edit.
- Choose one finish: close buzz, shaved with faint stubble, or fully bald.
- Request a hair-only change and list the features that must stay fixed.
- Compare source and result at the same crop, size, and screen brightness.
- Reject identity drift or anatomical artifacts before refining the style.
- Adjust one visible detail, then repeat the complete review.
Review the scalp contour and hairline transition
Follow the outline from one temple, over the crown, and down to the other side. The curve should connect naturally to the forehead, ears, and neck. Look for flattened areas, unexplained bumps, duplicated edges, or a silhouette that changes between the two sides without a believable camera reason. The top of the head should remain proportional to the face. If the source crop hides the crown, expect more interpretation and reject results that look anatomically implausible.
Next inspect the transition where hair used to meet skin. A close buzz may keep a soft tonal boundary, while a clean shave should not leave a hard painted line or a glowing halo. Fine baby hairs and sideburn remnants should agree with the chosen finish. Check around glasses arms, ears, and facial hair, where masking errors often appear. The edit should not erase an ear edge, merge frames into skin, or create a dark band behind the head.
Keep skin texture and lighting believable
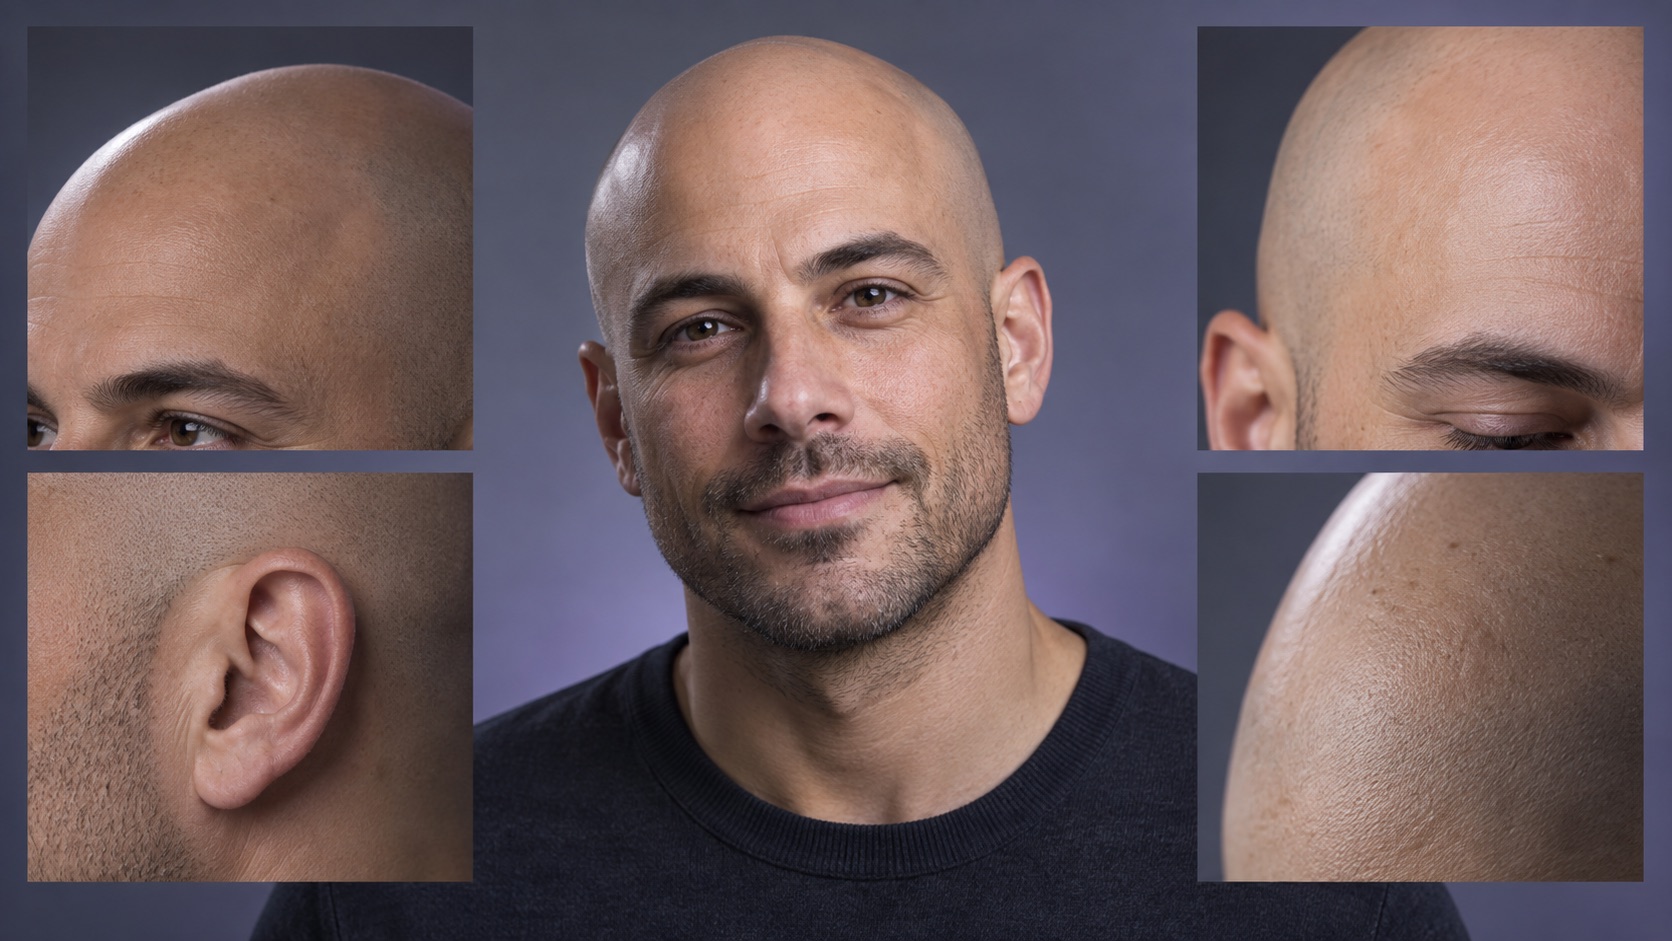
A realistic scalp is not a perfectly smooth plastic surface. It may show pores, subtle color variation, fine lines, freckles, or a trace of stubble consistent with the person and photograph. Texture should match the face in sharpness and grain. If the face contains natural detail but the scalp is airbrushed, the new area will look pasted on. If the result adds prominent spots, scars, or marks that were not visible or requested, treat them as invented details rather than facts about the person.
Light must behave continuously across the edit. Compare highlights on the forehead, nose, and cheeks with the highlight on the scalp. Shadows should fall in the same direction and have compatible softness. A studio light may create a broad gentle highlight, but a small bright glare can make the head look metallic. The earlier portrait preparation checklist explains how even light, focus, framing, and useful margins make later AI transformations easier to judge.
Check identity beyond the missing hair
Hair frames the face, so removing it can make familiar features feel more prominent even when their geometry has not changed. Compare stable relationships rather than relying on first impression: eye spacing, brow shape, nose width, ear height, cheek contour, jaw width, chin length, and the distance between the nose and mouth. Confirm that the filter did not narrow the forehead, enlarge the eyes, alter skin tone, or reshape the jaw to make the new style appear more flattering.
Also inspect accessories and the surrounding scene. Glasses should keep their exact frame shape and sit on the same points of the ears. Earrings, piercings, collars, and beard edges should not be duplicated or erased. Background lines passing behind the hair may need reconstruction; verify that a doorframe, horizon, or pattern remains straight and consistent. When comparing AI image editors, bounded changes and faithful preservation are more useful quality measures than dramatic transformation alone.
Use consent and context as quality controls
Use your own portrait or obtain clear permission from the identifiable adult shown. Hair and appearance can carry personal, cultural, religious, or medical meaning, so do not surprise someone with a public transformation or use their image for ridicule. A photo found on social media is not automatic permission to create a new version. Keep source images controlled, avoid filenames that expose private information, and delete experimental copies you no longer need.
Label the image as AI-edited when viewers could mistake it for a current appearance, a health update, or documentary evidence. Do not use a generated bald portrait to imply that someone has an illness, treatment, diagnosis, or hair-loss condition. The style preview should remain separate from medical decisions. If hair changes are causing concern, a generated image cannot evaluate the cause or recommend care; it only visualizes an invented appearance.
Choose the final version for its real destination
Review the approved concept at the size where it will appear. A faint stubble pattern visible on a large monitor may disappear in a small profile photo, while scalp shine that seems subtle at phone size may feel exaggerated in a large print. Test the image in the intended crop without adding more face edits. If the head is cut too closely at the top, return to a source with more space rather than inventing extra canvas around a nearly finished portrait.
Download the largest approved version, keep the untouched original, and name the edited copy clearly. A simple filename such as ai-bald-look-preview.jpg distinguishes it from a real photograph without embedding a person's full name. If the concept is for a barber conversation, bring the source and one or two restrained options. The goal is to communicate a direction—buzzed, closely shaved, or clean bald—while leaving real-world texture, growth pattern, and maintenance decisions open.
People also ask
Frequently asked questions
What photo works best with an AI bald filter?
Use a sharp adult head-and-shoulders portrait near eye level with the forehead, both ears, face, and full head contour visible in soft, even light.
Can an AI bald filter predict how I will look in the future?
No. It creates a fictional style concept from visible image cues. It cannot predict hair loss, scalp shape hidden by hair, genetics, health, or future appearance.
How do I make a bald filter look realistic?
Keep the edit limited to hair, then check identity, scalp contour, temple transitions, ears, skin texture, stubble, highlights, shadows, accessories, and background lines against the source.
Should I disclose that the portrait was edited?
Disclose the edit when viewers could mistake it for a current appearance, health update, documentary image, or endorsement. Never use it to mislead or embarrass another person.