
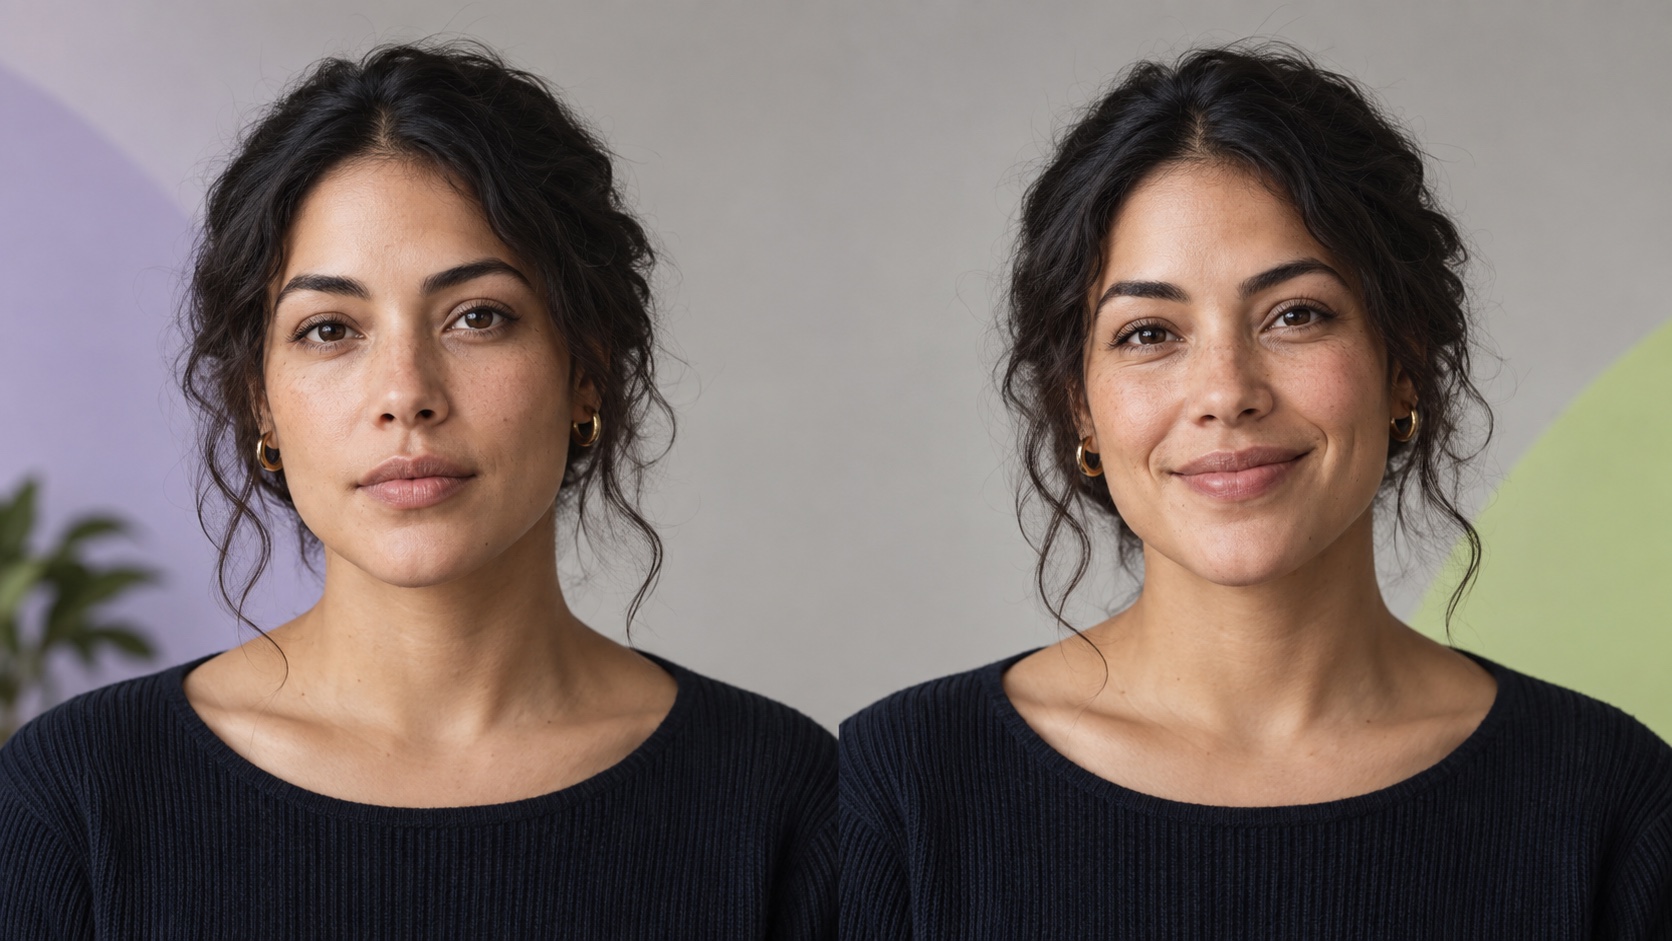
To add a natural smile to a photo with AI, use a sharp, front-facing adult portrait with visible eyes, cheeks, and mouth. Ask for a gentle expression rather than a dramatic grin, then compare the result with the source. The same person, head shape, eye spacing, skin texture, lighting, clothing, and background should remain recognizable. Review the eyes and cheeks as carefully as the teeth, because a believable smile changes the whole expression without redesigning the face.
What an AI smile filter should change—and preserve
A useful smile edit changes expression, not identity. It may lift the corners of the mouth, add a little volume to the cheeks, and create small expression lines around the eyes. Those changes should work together because a real smile is a coordinated facial movement. The result should still look like the source person in the same photograph, rather than a new face pasted into similar clothing. Facial proportions, hairstyle, skin tone, camera angle, and the surrounding scene should remain stable unless you deliberately request another edit.
Open the AI smile filter in Makerr Studio, then choose the dedicated natural smile editor. A focused workflow makes the review easier: if the only requested change is expression, any new hairstyle, altered jaw, different eye shape, or retouched background is clearly drift. Keep the original file beside every generated version so you can compare evidence on screen instead of relying on your memory of the person's face.
Choose a source portrait that leaves little to guess
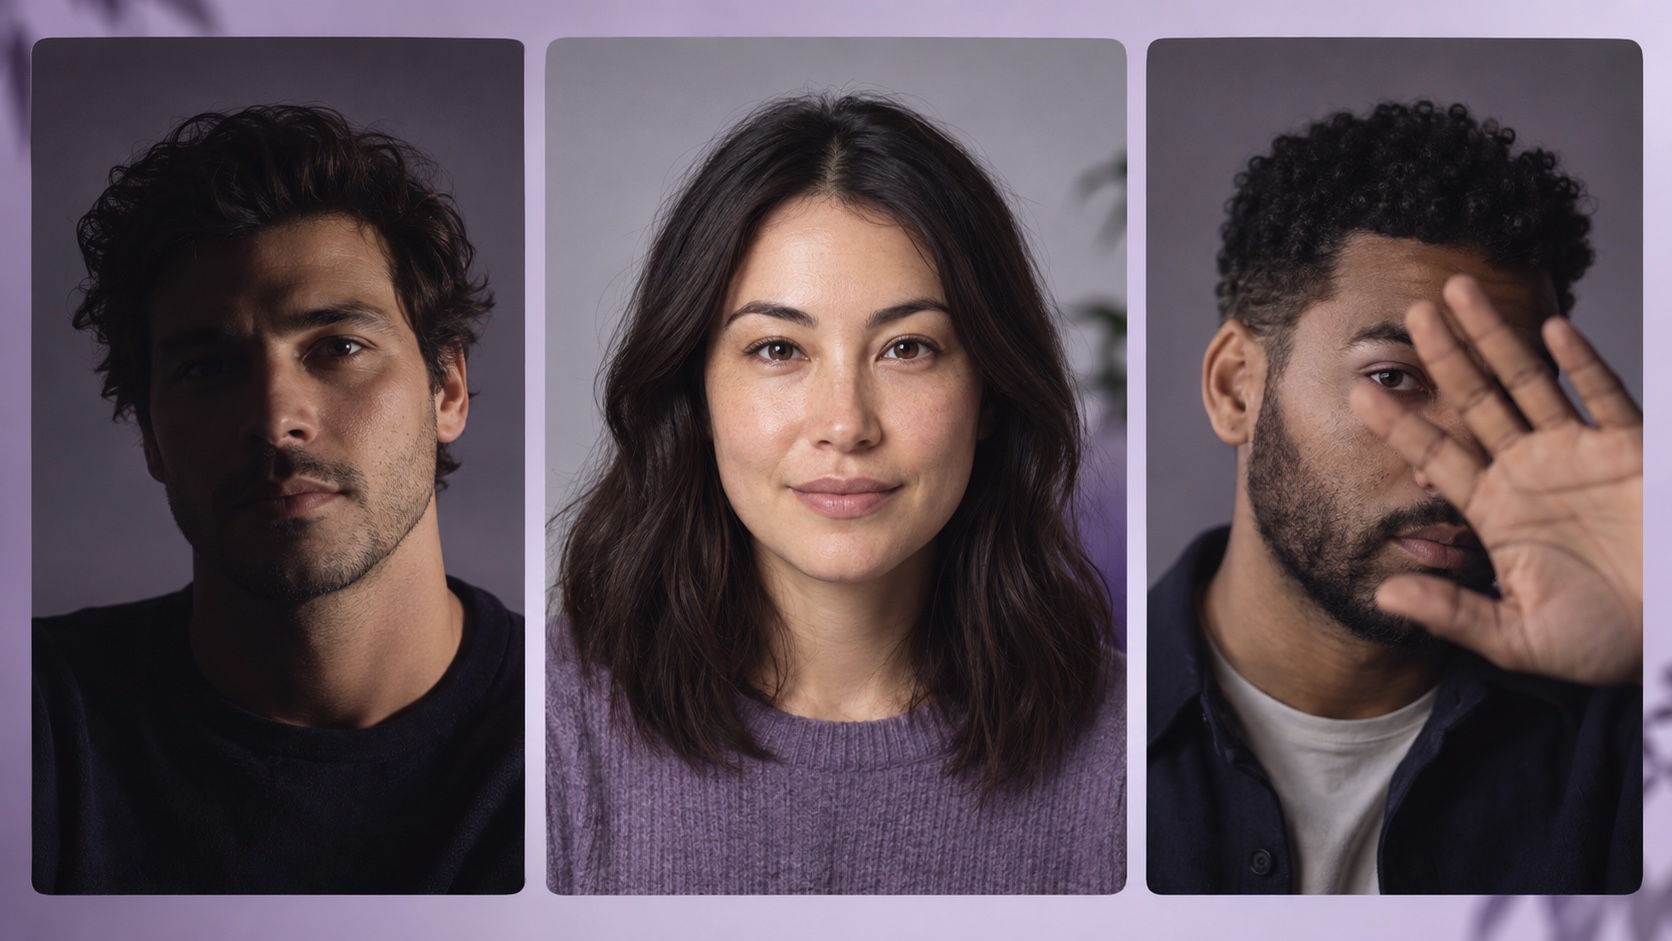
Start with a sharp head-and-shoulders photo taken near eye level. Both eyes, the cheeks, nose, lips, jaw, and hairline should be visible. Soft frontal light or gentle side light gives the tool enough facial structure without hiding half the expression. A neutral mouth or very slight smile is an easier starting point than a tense grimace because the edit requires less reconstruction. Use the largest original you have rather than a screenshot or a copy saved repeatedly through messaging apps.
Avoid sunglasses, a hand across the face, hair covering the mouth, strong motion blur, and deep shadows over one eye. A dramatic profile can work creatively, but it is harder to judge symmetry and identity. Heavy beauty filters are also poor source material: they may erase pores, expression lines, and natural tooth color that help a new smile belong to the photograph. If the portrait already looks artificial, a technically neat mouth edit can still feel disconnected from the rest of the face.
Decide what kind of smile fits the photograph
Natural does not mean identical for every person or every setting. A professional profile may need a gentle closed-mouth smile. A casual travel photo might suit a slightly open smile with visible teeth. A broad laugh changes the cheeks, eyelids, nose, and jaw more strongly and therefore asks the system to rebuild more of the expression. Start with the smallest useful change. You can increase warmth or openness later if the first result preserves the person and scene convincingly.
Describe the intention in plain visual terms: a relaxed gentle smile, lips naturally closed, subtle lift in the cheeks, and the same gaze and head position. Avoid vague requests such as make me look better or perfect my teeth. Those phrases invite unrelated cosmetic changes and create no clear review standard. If visible teeth are important, ask for realistic tooth shape and color consistent with the photograph. Natural teeth vary slightly in alignment, size, edge, and tone; uniform bright tiles usually make the image less believable.
Step by step: add a subtle smile with AI
Upload the selected portrait and keep the first request narrow. Ask only for a subtle natural smile while preserving identity, pose, hair, clothes, lighting, and background. Generate one result, place it beside the source at the same size, and check the entire image before asking for another variation. If the identity holds, decide whether the expression already fits the context. A small, credible improvement is usually more useful than the most dramatic option.
When a revision is needed, change one variable at a time. You might request a slightly warmer expression, less visible teeth, or a more relaxed mouth. Do not combine a wider smile, smoother skin, brighter eyes, a new hairstyle, and different lighting in one request. Multiple changes make it difficult to identify what improved and increase the chance that the image stops matching the source. Save the preferred version before each new edit so a promising result is never lost in a longer experiment.
- Upload a sharp portrait that you have permission to edit.
- Request one gentle smile while preserving the rest of the photograph.
- Compare the generated image with the source at the same crop and size.
- Reject identity drift or facial artifacts before refining the expression.
- Adjust only one detail, then repeat the full comparison.
- Save the approved image and keep the untouched original.
Review the eyes, cheeks, mouth, and teeth together
Begin above the mouth. A genuine-looking smile often narrows the lower eyelids slightly and raises the cheeks, but the effect should not force both sides into perfect symmetry. Confirm that eye color, spacing, gaze, eyelashes, brows, and any glasses still match the source. Then check the nose and nasolabial area. New shadows should follow the same light direction as the original portrait, and folds should remain subtle enough for the person's age and expression.
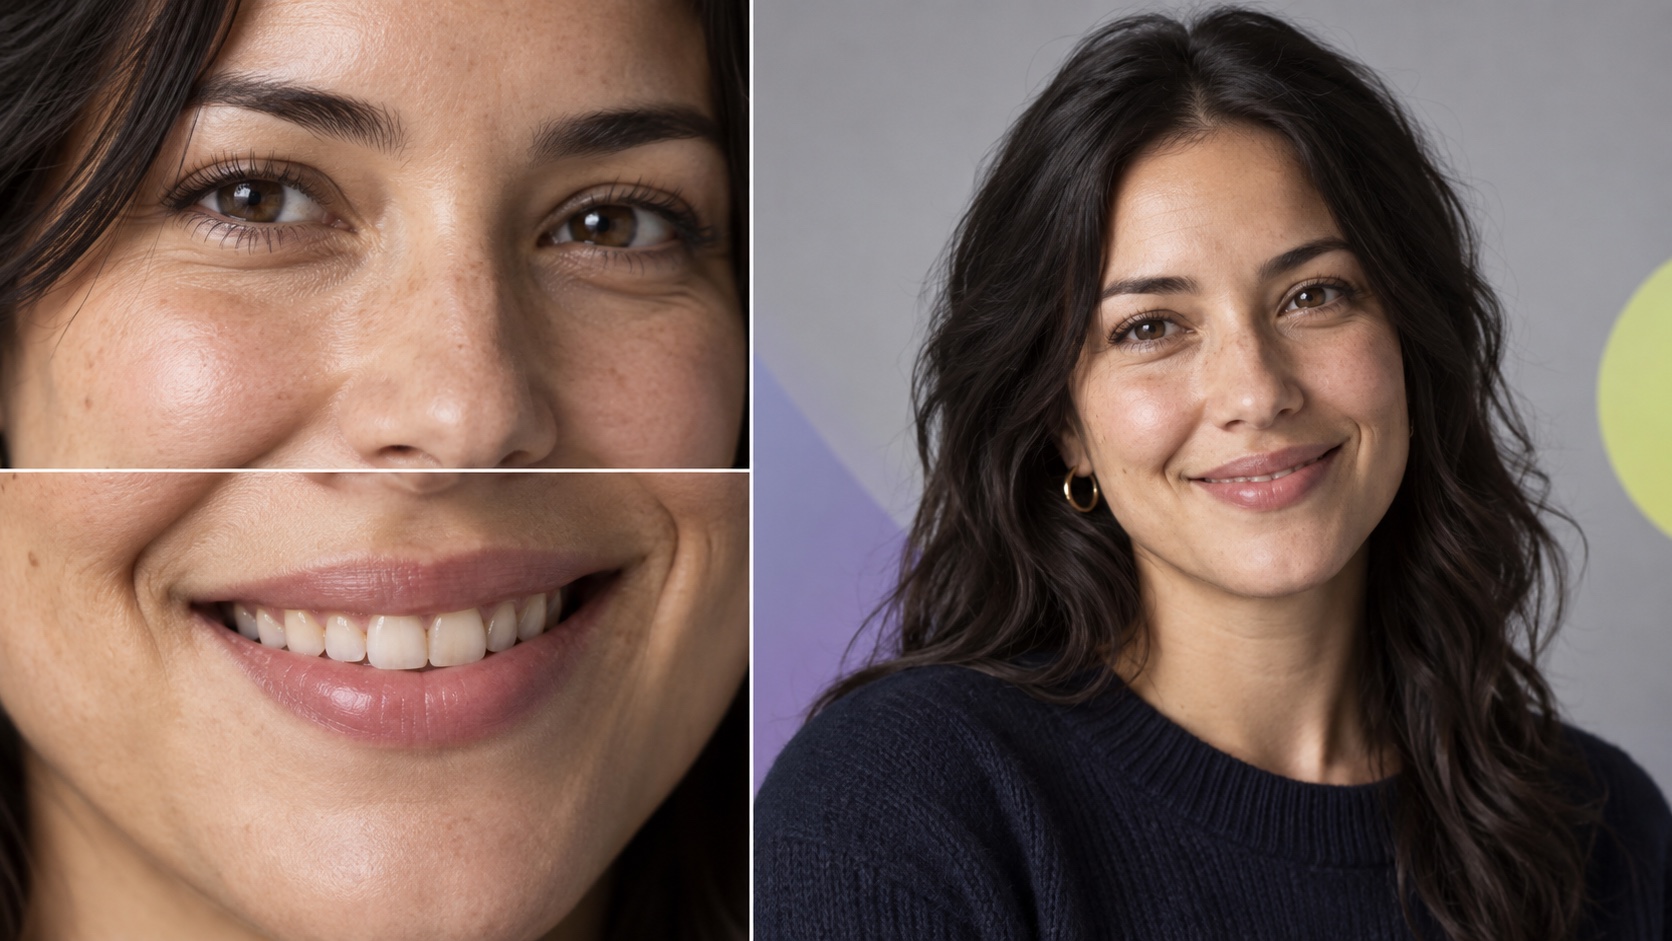
Inspect the lips and teeth at full size, then zoom back out. Look for doubled lip edges, blurred corners, missing gaps, repeated teeth, extreme whitening, or a mouth that sits at a different angle from the jaw. The inside of an open mouth should have believable depth rather than a flat dark shape. Finally, compare ears, chin, hairline, jewelry, and clothing. An edit can draw attention to a convincing smile while quietly changing a nearby feature, so the review must extend beyond the requested area.
Keep identity, texture, and lighting consistent
Identity is carried by relationships between features, not by one landmark. Compare eye spacing, brow shape, nose width, cheek contour, jaw outline, chin length, and the distance between the nose and mouth. Small differences can accumulate into a face that looks plausible but belongs to someone else. If that happens, return to the original and reduce the requested expression. Trying to repair several drifting features on an already altered image can compound the problem.
Skin texture and light help the mouth feel physically connected to the portrait. Pores, freckles, facial hair, makeup, and expression lines should continue across the edited area at a believable level. Highlights on the lips and teeth should agree with highlights on the eyes and nose. The portrait preparation checklist explains how source lighting, framing, and image quality affect later AI transformations. Better source information usually gives you a clearer basis for judging the result, even though no input guarantees a perfect edit.
Use consent and context as part of the workflow
Edit your own portrait or one you have clear permission to change. A smile may seem like a small adjustment, but expression affects how other people interpret emotion, agreement, confidence, and mood. Do not alter someone into appearing happy about an event, product, or statement they did not endorse. For children, shared family photographs, workplaces, and client projects, confirm who can approve the edit and where the resulting image may be published.
Tell viewers that the image was altered when the new expression could change the meaning of the moment or be mistaken for documentary evidence. Avoid using a generated smile to create a false testimonial, news image, dating identity, or professional endorsement. When you compare AI image editors, include privacy handling, consent controls, and the ability to keep changes bounded in your evaluation—not only how polished the output looks. A responsible result respects both the visible person and the audience receiving the image.
Choose the final version for its real destination
Review the portrait at the size and crop where it will appear. A subtle closed-mouth smile may read clearly in a large profile but disappear in a small team directory. A toothy expression that looks friendly on a phone screen may feel too strong in a formal biography. Test the final image in its intended layout without adding more facial edits. If the face becomes unreadable when reduced, adjust the crop or choose a different source rather than exaggerating the expression solely to compensate.
Download the largest approved version, preserve the untouched source, and give the edited copy a clear filename. Check that the file opens normally and that its dimensions suit the intended platform. If you later resize or compress it, compare edges around hair, glasses, lips, and teeth for artifacts. Keep only the versions you can explain: original, approved smile edit, and any delivery-sized export. That small record makes future updates easier and helps prevent an experimental variation from being published by mistake.
People also ask
Frequently asked questions
What photo works best with an AI smile filter?
Use a sharp, front-facing adult portrait in soft, even light with both eyes, cheeks, mouth, jaw, and hairline visible. Avoid heavy filters, motion blur, deep shadows, and obstructions.
How do I make an AI smile look natural?
Begin with a gentle expression and compare the eyes, cheeks, lips, teeth, texture, and lighting with the source. Reject any version that changes identity or adds unrelated retouching.
Can an AI smile filter fix teeth?
A smile filter may render visible teeth as part of the expression, but it is not dental treatment or diagnosis. Keep tooth color and shape realistic, and do not treat the result as a clinical prediction.
Should I disclose that a smile was added with AI?
Disclose the edit when it could change the meaning of the moment or imply an emotion, endorsement, or event that did not occur. Never use it to mislead viewers about another person.